With the Destiny 2 livestream event only three days away, I needed to find a way to record the livestream to my computer so that I could re-watch it in case I missed anythin important and so I could grab some screenshots of any new weapons and armour that is shown.
After some google searching I have found away that is fairly simple, to record the Bungie livestream footage from Twitch. If you would like to know how, continue reading.
Installing the required software
You only need two pieces of software to be able to record the Bungie livestream, VLC Media Player and Livestreamer.
You can download VLC from here and you can download Livestreamer from here (click on the ‘Installer’ link to download the Livestreamer v1.12.2 Windows setup file.)
Once you have both pieces of software downloaded, install VLC by runningthe installer and following the setup instructions as you would any other program.
Once you have installed VLC, run the installer for Livestreamer, again following the setup instructions. Once livestreamer is installed, the last screen of the setup process should have a checkbox checked with ‘edit configuration file’. Click Next and the Livestreamer configuration file will open.
At the bottom of the configuration file, paste the following;
http-header=Client-ID=jzkbprff40iqj646a697cyrvl0zt2m6
We have to paste this is as Twitch has updated there API since the last version of Livestreamer. Once you have the line above pasted in, go ahead and save the configuration file.
Now that we have that done, we need to open up a windows command prompt. If you are on WIndows 10, type command prompt or ‘cmd’ into the Conrtana search box and it should appear.
Next type the following into the command prompt;
livestreamer https://www.twitch.tv/gamerwithadegree 720p
You should replace gamerwithadegree with bungie when it is time to record the Destiny 2 livestream, for now you can replace it with any twitch stream URL that you want to record. The 720p at the end is the quality of the stream recording, 720p seems to be the best quality there is.
Once you have typed in the above line with the stream you want to record, hit ENTER and it should open up an instance of VLC media player, with the stream playing in the VLC window.
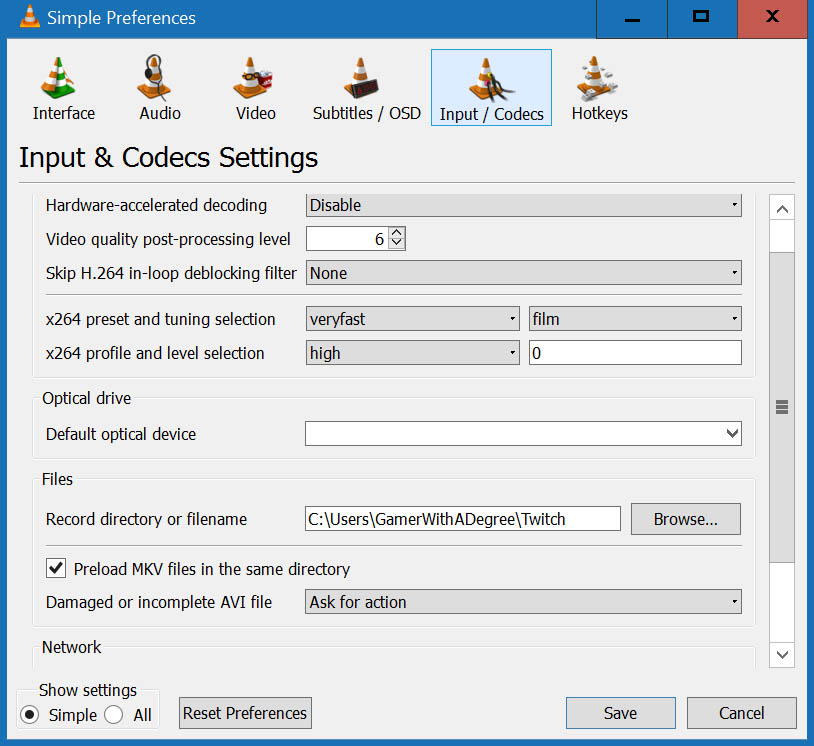
Now we can start recording the stream. On the VLC Media Player window, navigate to Tools > Preferences the click the Input/Codecs tab. Now, scroll down to where it says Record directory or filename, click the Browse button and select a location where you want the stream to record to. Once you have selected a location, click Save.
Next, on the VLC window, navigate to the top of the window and select View > Advanced Controls, this display some new options just underneath the stream window. You will now see the red Record button and the button next to that is the screenshot button.
That is pretty much all there is to it. Jave a couple of trial runs recording some Twitch streams to make sure everything is working correctly and you should be good to go on Thursday.